How to Sharpen Golf Club Grooves: A Complete Guide
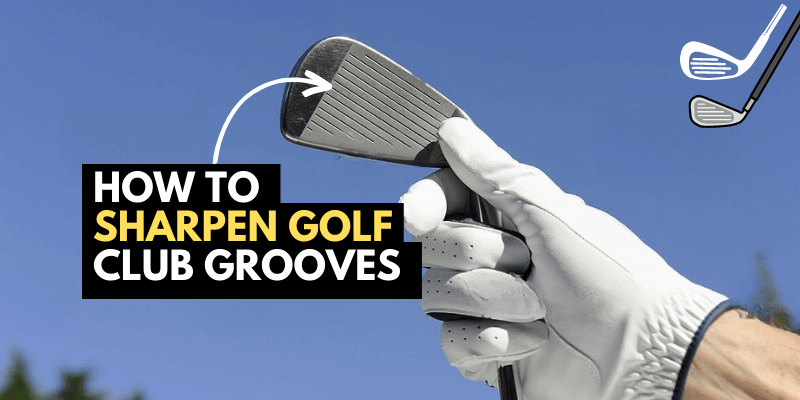
Golf club grooves are the thin lines on the clubface that help create spin and control of the ball. They are essential for improving your performance and accuracy on the course. However, over time, they can get worn out, dirty, or damaged by regular use and exposure to different playing conditions. This can affect your shot quality and distance, as well as your compliance with the rules of golf.
That’s why it’s important to sharpen your golf club grooves regularly. Sharpening your grooves can restore their effectiveness, enhance their metal, and create an extra spin on the ball. It can also help you avoid penalties for having illegal grooves that exceed the depth limit set by the USGA.
In this article, we will show you how to sharpen golf club grooves in five easy steps. We will also answer some frequently asked questions about golf club groove sharpening.
Step 1: Clean the Clubhead
Before you start sharpening your grooves, you need to clean the clubhead thoroughly. This will remove any dirt, grass, or debris that may be stuck in the grooves or on the clubface. You can use a soft brush, a damp cloth, or a tee to scrub the clubhead gently. You can also use some soap and water to wash it, but make sure to dry it well afterward.
Cleaning the club head will not only make it easier to sharpen the grooves but also help you see their condition better. You will be able to identify which grooves need more attention and which ones are still in good shape.
Step 2: Secure the Clubhead
The next step is to secure the club head in a stable position. You can use a vise, a clamp, or a rubber band to hold the clubhead firmly. This will prevent it from moving or slipping while you are sharpening the grooves. It will also protect your hands from getting injured by the sharpener or the clubface.
Make sure to wrap the club head with a cloth or a towel before securing it. This will prevent any scratches or damages to the club head from the vise or clamp. You can also use some masking tape or painter’s tape to cover the areas of the clubface that you don’t want to sharpen.
Step 3: Choose the Right Sharpening Tool
The most important step is to choose the right sharpening tool for your golf club grooves. There are different types of tools available in the market, such as honing rods, whetstones, small files, or groove sharpeners. Each tool has its own advantages and disadvantages, depending on your budget, preference, and skill level.
The most common and recommended tool is a groove sharpener. A groove sharpener is a small metal device with one or more sharp edges that fit into the grooves of your clubface. It is designed to remove metal material from the grooves and restore their shape and depth. It is easy to use, effective, and affordable.
Some groove sharpeners have carbide blades that are more durable and efficient than steel blades. Some also have different tips that match different groove configurations, such as U-shaped, V-shaped, or square-shaped grooves. You can choose a groove sharpener that suits your clubs best.
Other tools that you can use are sandpaper or a Dremel tool. Sandpaper is a cheap and simple option that can smooth out rough edges and polish your grooves. However, it may not be able to remove enough metal material or create enough spin on the ball. A Dremel tool is a high-speed rotary tool that can cut through metal quickly and precisely. However, it may be too powerful or risky for beginners or amateurs.
Step 4: Sharpen the Grooves
Once you have chosen your sharpening tool, you can start sharpening your grooves. The basic technique is to place the tool on one end of a groove and slide it back and forth along its length until you reach the other end. You should apply moderate pressure and make sure to keep the tool aligned with the groove.
You should repeat this process for each groove on your clubface until they are all sharpened evenly. You should also check the depth of your grooves periodically with a gauge or a coin to make sure they are within the legal limit of 0.035 inches.
Depending on your tool and your desired results, you may need to use different strokes or angles for different grooves. For example, if you are using a honing rod or a whetstone, you may need to use coarser strokes for deeper grooves and finer strokes for shallower grooves. If you are using a small file or a groove sharpener, you may need to use different tips for different groove shapes.
You should also be careful not to over-sharpen your grooves or damage your clubface. You should use light and smooth strokes and avoid digging or scraping too hard. You should also avoid sharpening the edges or corners of your clubface, as this may affect the bounce or the loft of your club.
Step 5: Clean the Clubhead Again
The final step is to clean the clubhead again after sharpening your grooves. This will remove any metal shavings, dust, or residue that may have accumulated on the clubface or in the grooves. You can use a soft brush, a damp cloth, or a tee to wipe off the clubhead gently. You can also use some water or a cleaning solution to rinse it, but make sure to dry it well afterward.
Cleaning the clubhead again will not only make it look shiny and new but also help you see the results of your sharpening better. You will be able to notice the difference in the appearance and performance of your grooves. You will also be able to test your clubs on the course and enjoy the benefits of sharpening your grooves.
FAQs
How often should I sharpen my golf club grooves?
There is no definitive answer to how often you should sharpen your golf club grooves, as it depends on several factors, such as how often you play, what kind of clubs you use, what kind of courses you play on, and how well you take care of your clubs. However, a general rule of thumb is to sharpen your grooves at least once a year, or whenever you notice a decline in your shot quality or distance.
What are the signs that my golf club grooves need sharpening?
Some of the signs that your golf club grooves need sharpening are:
- Your shots are less accurate or consistent
- Your shots have less spin or control
- Your shots fly higher or shorter than usual
- Your clubs feel dull or slippery
- Your grooves look worn out, dirty, or damaged
What are the risks of not sharpening my golf club grooves?
Some of the risks of not sharpening your golf club grooves are:
- You may lose confidence or enjoyment in your game
- You may lose an edge over your competitors
- You may incur penalties for having illegal grooves
- You may damage your clubs or balls
What are the best golf clubs for sharpening grooves?
The best golf clubs for sharpening grooves are irons and wedges, as they are the ones that rely most on spin and control. They are also the ones that get worn out faster due to frequent use and contact with different surfaces. Drivers and woods are less suitable for sharpening grooves, as they have fewer grooves and more emphasis on speed and distance.
Can I sharpen my golf club grooves myself?
Yes, you can sharpen your golf club grooves yourself, as long as you have the right tools and skills. However, if you are not confident or experienced enough, you may want to seek professional help from a golf shop or a club fitter. They can provide you with expert advice and service, as well as ensure that your clubs are compliant with the rules of golf.
Conclusion
Sharpening golf club grooves is a simple and effective way to improve your performance and accuracy on the course. It can help you create more spin and control on the ball, as well as avoid penalties for having illegal grooves. All you need is a suitable tool and some basic steps to follow.
We hope this article has helped you learn how to sharpen golf club grooves in five easy steps. We also hope it has answered some of your questions about golf club groove sharpening. Now that you know how to do it, why not give it a try and see the difference for yourself?
Happy golfing!




2 Comments